Blog > Create a fill-the-gaps quiz with Storyline

Create a fill-the-gaps quiz with Storyline

Written by Rosaria
Articulate Storyline360 is a great authoring tool (I use it myself for my learning projects) and it has a lot of fantastic built-in features and quiz types. In particular you can easily create graded questions such as true/false, multiple choice, matching drag-and-drop, numeric, hotspot and a few more. Storyline also proposes a “fill-in-the-blank” kind of question, but the user must enter some text in it. There is no “built-in” way of adding a fill-in-the-blank quiz where users must pick their choice from a drop-down list. If this is exactly what you’d like to create, you’re in the right place as, fortunately, I have a workaround for you. Read this post until the end and you won’t be disappointed!
Create the questions
First of all, let’s create a few questions and choose some possible answers (only one true) for them. For this article I am going to make some random general knowledge questions, just to show you the method I’ll use.Question 1 (Archimedes’ principle)
“Any object, totally or partially immersed in a fluid or liquid, is buoyed up by a force ________ the weight of the fluid displaced by the object”.
Possible answers
- equal to
- greater than
- lesser than
Question 2 (World’s capitals)
The capital of Turkey is _______
Possible answers
- Istanbul
- Ankara
- Izmir
Question 3 (Fairy tales)
The fairy tale Snow White was written by_________
Possible answers
- Hans Christian Andersen
- The Brothers Grimm
- Charles Perrault
Add the questions to your project
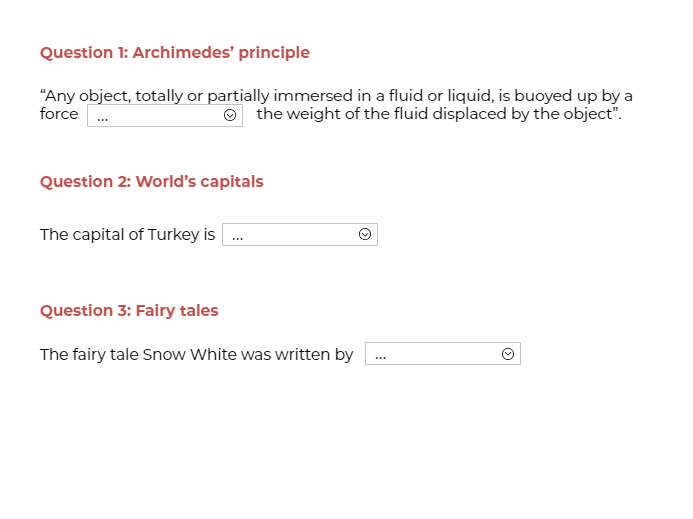
Let’s now open a new Storyline project and write down our 3 questions. Create a rectangular shape and set its background color to white and its outline color to grey (of course you can pick any color you want). Secondly, let’s create a text box for the first set of answers to question 1. Let’s type three dots (“…”) and put this textbox on top of the rectangle. Now let’s add a nice arrow-like icon that will suggest to the users that they will have to click on it. Repeat this step for the other two questions (you can just copy and paste the three elements that you just create). You’ll have something like the image here.
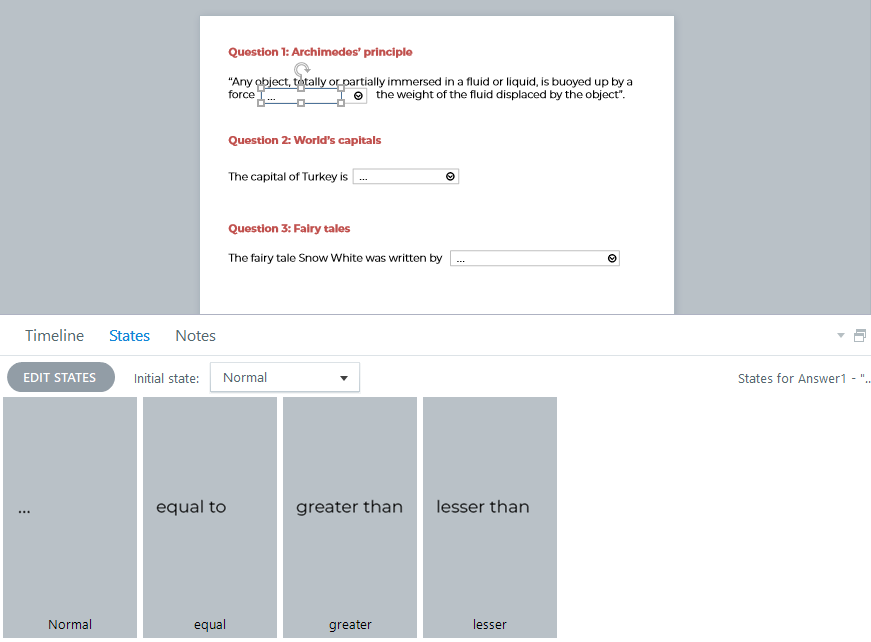
The next step is to create some new “states” for these text boxes. These new states will represent the possible answers to our questions. So, for Answer1, we’ll create 3 new states, we’ll type in the possible answers (“equal to”, “greater than” and “lesser than” instead of the 3 dots) and we’ll give the states meaningful names, such as “equal”, “greater” and “lesser” (it will be useful in the final step). You’ll have something like what is shown in the image here.
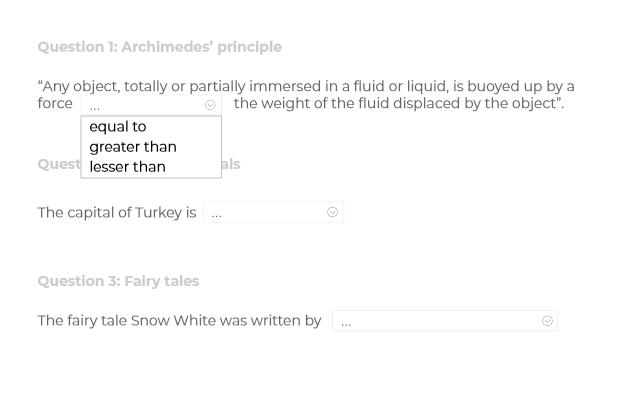
We have now to create the actual drop-down “menu” with all our answers the users will have to pick from. First of all, let’s create three new layers, that we are going to call “Question1”, “Question2”, and “Question3”. In each of these layers, draw a rectangle that has the same width of our answer’s rectangle and a height that is around 3 times the height of our answer’s text box. Choose a white background and a grey outline (or whichever colours you prefer) and put this rectangle below the corresponding “gap to fill” area. Now, we’ll have to create three new textboxes for each question and type in the corresponding possible answers. Rename these textboxes as well. I chose to rename them “q1a1”, “q1a2”, and “q1a3”, respectively. For the layer “Question1”, you’ll have something like what is shown in the image here on the right.
Add the triggers
Ok, so now here’s the “tricky” part. Basically, what we want to do is to say two things to Storyline: “Hey! When a user clicks on the arrow icons, show them the possible answers” and then “When the user picks an answer, fill the gap with the answer chosen”.
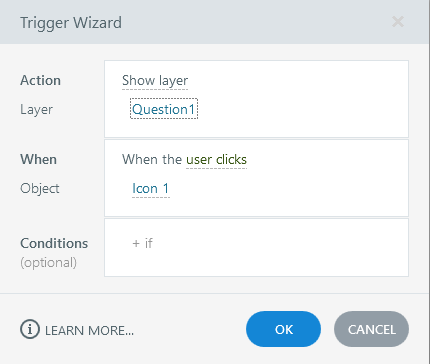
In order to do that, we are going to work with triggers. For each of the three arrow icon create a trigger that does the following (here the example for Question1):
“Show layer Question1, when the user clicks on Icon1”, like in the image here.
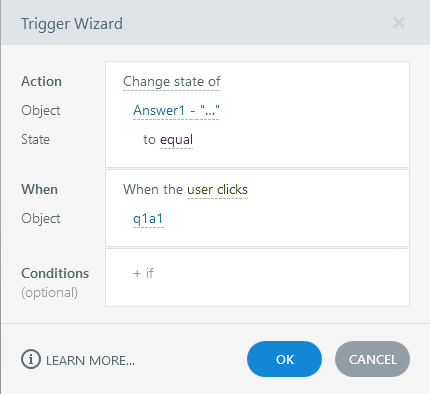
In order to do the second part, in each layer we’ll have to create three more triggers that will allow us to change the state of our three dots and let it “become” the answer that the user has chosen. Let’s set up the triggers as follows (here the example for Answer1 and q1a1):
“Change the state of Answer1, to “equal” when the user clicks on q1a1”, like in the image here on the right.
We also want the layer to automatically close after the user has picked an answer. Add a trigger that closes the layer (“this layer”) when the user clicks on a particular answer. We have to repeat these steps for all the layers and all the answers.
Pro tip: In Articulate the order of the triggers counts! Make sure that the “Change the state trigger” is above the “Close the layer” trigger so that the first action executed is the change of state.
Wrap everything up
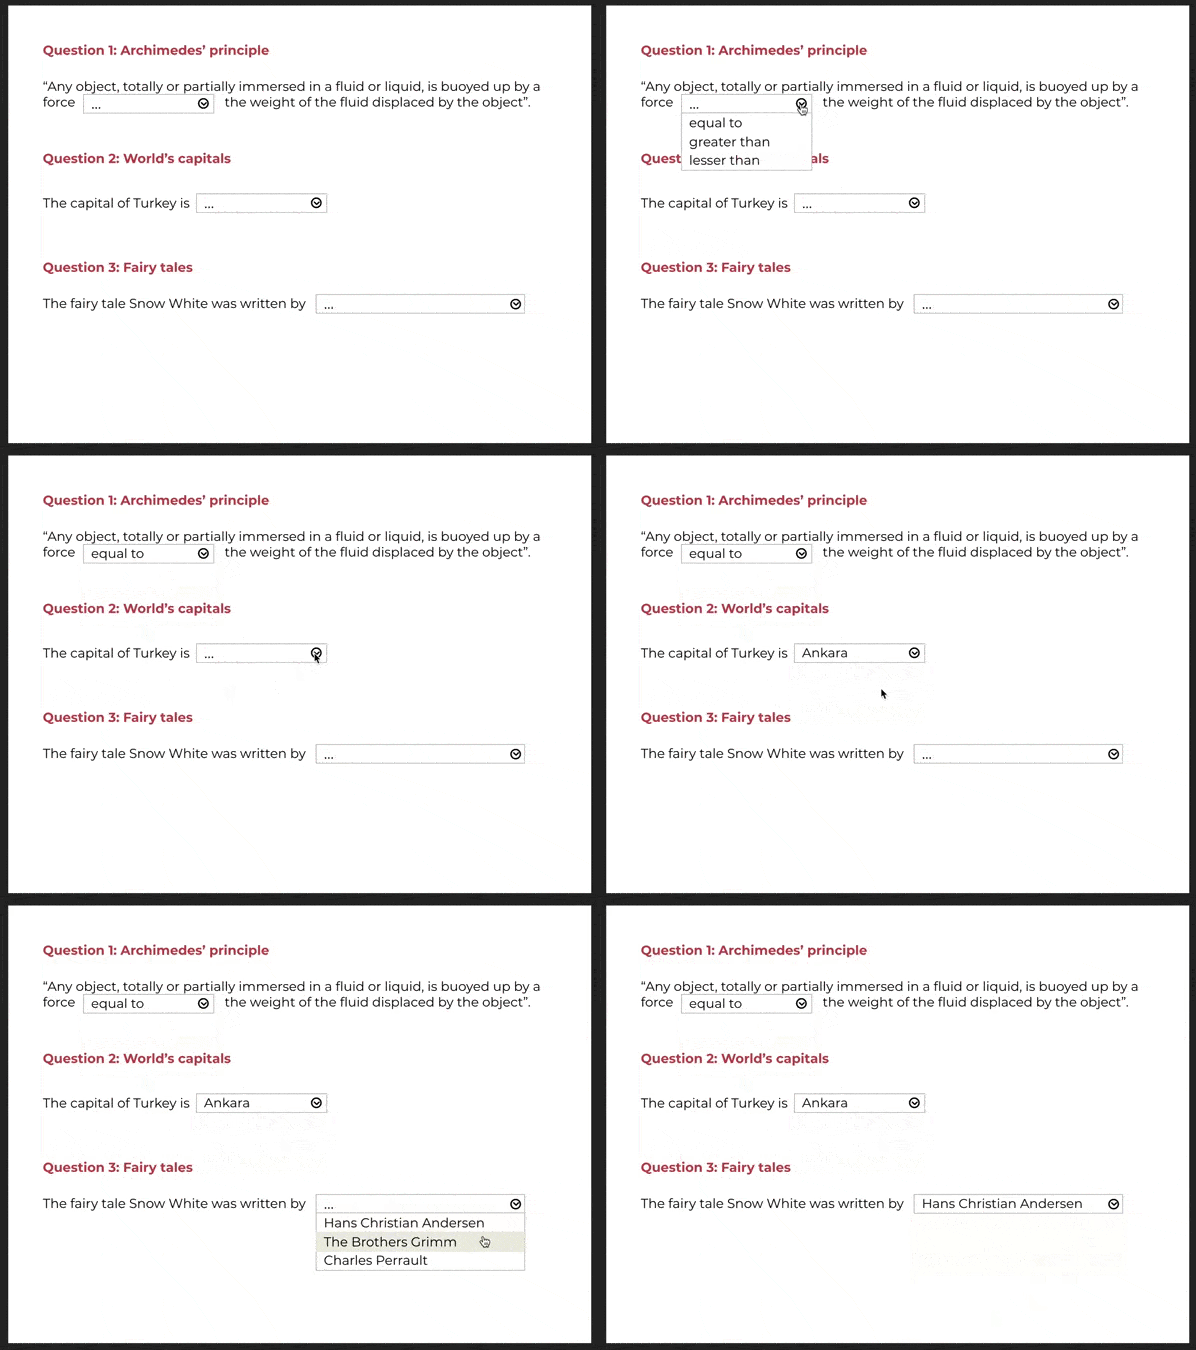
This is the very basic procedure to create a fill-in-the-gaps assessment. We could, however, improve it even more, for example by adding some hover effects. Storyline makes it so easy to do: you only have to create new states for the textboxes in our layers (there is a built-in “Hover” state) that we only have to customise as we want… Isn’t that great? For this example I chose a different background colour for the hover state. The final result is shown in the video here below.
You can download the Storyline file here.
Stay tuned for my next blog post to learn how to create a results slide for this quiz!
Related Articles
Related
Assess learners’ learning
There are several storyboard formats and their use depends on what you want to achieve. We will look at three types of storyboard for three different contexts and how to use them.
What to do and what to avoid when creating an e-learning storyboard
As we’ve seen in the previous article here, there are several types of storyboard and the format used depends on the context. Whatever the choice, here is a list of mistakes to avoid and tips to remember when developing effective storyboards. What to avoid Include too...
Types of Storyboards for e-learnings
There are several storyboard formats and their use depends on what you want to achieve. We will look at three types of storyboard for three different contexts and how to use them.
